|
|
|
 The first thing you must do is get an idea of where and how you're going
to run the intercooler piping as this will determine where the intercooler
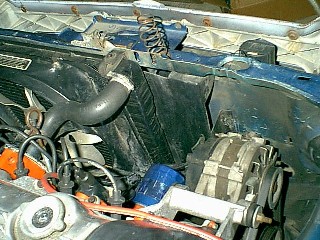
gets mounted. On my T1 Charger I had about 3 inches space on the passenger
side of the radiator covered by a black plastic piece. I could run the
pipes through here. But thinking about also brought about nightmares of
intercooler pipes snaking their way around plus the oil filter, upper radiator
hose, and distributor would yield obstacles to go around not to mention
having to remove the pipes to get the filter or distributor. If you have
a Daytona or another body style you have more room up there but us L-body
folk have a tight squeeze. So what about moving the radiator over and running
the hoses over to the side where a stock intercooler would be in a T2 car?
Well altough it seemed to be a PITA, it really didn't turn out to be that
hard.
 The first and most obvious thing was that the bulky stock fan would hit
the oil pressure sending unit if it came towards the passenger side very
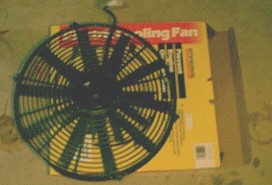
much. So in order to do this I would have to have a slimmer fan. Down at
the local Advance Auto I found several aftermarket slim fans. I chose the
biggest, 16", since the price difference among them was not very great.
It just so happens that this is nearly the exact same
size as the stock fan.

So it's time to mount this thing. First I had to
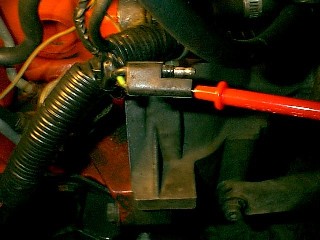
figure out which wire on the stock fan harness was positive. So I started
the car, unplugged the coolant sensor, and fired up the multi-meter. It
turns out that the green wire is the positive one.
Then I used an old connector I had laying around so that I could plug the
new fan into the existing harness plug. After soldering it on, noting the
positive and negative wires, I was ready to mount this thing. After using
the not so great mounting hardware that came with the fan and plugging
it in, everything worked just dandy. Once that thing turned on it was evident
the advances in fan technology since the '80s. It was smoother, quite,
flows really good, and only draws 11 amps. So now it was time to move over
the radiator.
The first thing I noticed was that the upper radiator mount already has two holes drilled about 2" to the passenger side that can be used to move the radiator over. So now I just had to figure out the bottom. My dad and I decided to use a flat piece of steel to bolt across the existing lower radiator mounts and then drill two new holes towards the passenger side that the bottom of the radiator would slip in when bolted to the two holes at the top. So now the radiator was physically bolted 2" to the passenger side, all was left was to hook up the hoses. The lower radiator hose has a straight section where it hooks on to the radiator so all we had to do was cut 2" off it to hook it back on. The upper radiator hose was a little harder. I went to Advance Auto and just perused their hose aisle and behold right beside the stock hose for my car was a hose that looked like it maybe went to daytona or something. It was a little to long from engine to radiator but had the perfect extra length needed for the 2". So I just trimmed the hose a inch or two at the ends and it fit perfectly. Now it was time to put the long awaited intercooler in.
With the radiator moved over, the intercooler would
sit right where the straight outlet points forward through the new gap.
This is helpful since the other side of the intercooler, the angled outlet,
is pointing back towards the gap that was made. I don't know how much room
is in the fascia of other cars but SC's have just enough for this angled
pipe to run back out the gap beside the radiator. The intercooler was to
be mounted up against the back side of the front bumper. I'm not sure how
the 4 door L-bodies are but the 2 doors' bumper is parallel to the front
of the car in the middle but angled away from the car at the sides. This
made it easy to make a bracket for the passenger side of the intercooler
but more diffucult for the driver side bracket since it had to come out
and down from the bumper. This location put the majority of the intercooler
right behind the right most opening in the SC fascia with a little intercooler
peeking out in the middle hole of the fascia. Another diffulculty was that
in order for the driver side intercooler outlet to clear the bumper mounting
plate the middle radiator support column, extending down from under the
hood latch to give support, had to be cut a some in one section. This made
the column a little less rigid but I've had no problems with it or with
the hood closing. Using a dremel I cut a little section out of the support
column to scoot the intercooler over. The passenger side bracket was easy
to make. We just used a piece of flat steel strap with pre-drilled holes
in it. This same strap is available at most hardware stores and is a good
choice since it just so happens the the bolt holes on the intercooler line
up perfectly with the pre-drilled ones. Then we needed to drill one hole
in the upper and lower lips of the bumper to bolt the strap to. It can
be done without taking of the fascia or the bumper. What you will have
to do is drill at a slight angle from perpendicular and since we were drilling
at an angle we first made a guide hole with a bit smaller than the mounting
bolts and then went back through with a bit slightly larger than the mounting
bolts ( I believe they were 3/8"). After this was done we had to make the
driver side mount. For this we used the same material we used for the lower
radiator mount, flat steel bar. After several adjustments to the driver
side mount we finally had the intercooler mounted. In order to run the
intercooler pipes, the overflow bottle has to be moved. I chose to just
use an unviersal and smaller overflow mounted where the battery used to
be. I also had been using a monster V-8 oil filter that would not come
off now with the radiator in the way so I went one size down (same diameter
but shorter) to Pure One Puralator # PL10193.
Check out the pics!
| Damages: | |
| T2 intercooler - used | $50 |
| 1G Talon BOV - used | $45 |
| Flat steel bar | $5 |
| Slim radiator fan | $70 |
| Upper radiator hose | $12 |
| New overflow bottle | $6 |
| Misc. nuts and bolts | $5 |
| Total | $193 |
Intercooler Hoses:
Now the only thing left to do is making up the pipes.
This sounds harder than it is. I made mine in about two hours from basic
parts. I simply used 2" radiator hose and two 90 degree 2" electical conduit
bends. I know Gus and others use 2.25" OD exhaust pipe and 2.25" ID truck
radiator hose but 2.25" OD thick walled exhaust pipe is only ~ 2" ID and
thin walled is about 2.125". The metal 90 degree bends I used were 2" ID
and when compared to the thick exhaust pipe had the same inner diameter.
I got 2" radiator hose to fit over it. I picked up the 90 degree
bends from Lowe's on the electrical aisle for $6 a peice. I then went to
Advance Auto and just looked through their radiator hose and found three
hoses. All the hoses were $11 a piece and between the three I got 2-90
degree bends, 4-45 degree bends, and 2 feet of 2" ID hose. I also had to
get 18 2.25" worm clamps from Lowe's priced at $0.92 a piece.
The lower hose (turbo to IC) consists of a straight
3" peice of hose, a 90 degree metal bend going over the transmission, another
piece of hose, a 45 degree metal bend going to the intercooler (90 degree
bend cut in half), and then another piece of hose. The upper intercooler
hose (IC to TB) consists of a 45 degree piece of hose, a 12" piece of 2"
ID pipe, a 90 degree piece of hose, a 3" piece of pipe, a 45 degree piece
of hose, a 3" piece of pipe, a 45 degree piece of pipe, a 5" piece of pipe,
and a 3" peice of rubber hose. The inlet hose (cone filter to turbo inlet)
is just a 45 degree peice of metal pipe, and a 90 degree peice of rubber
hose with a 5" and 2" leg. Everything was connected together with hose
clamps. The 2" rubber hose is hard to get over the intercooler barbs but
30 seconds in the microwave made them go on easy. (Warning: microwaving
rubber is probably not good for your health, so don't do it or blame me
when your burrito's taste like radiator hose.)
Check out the intercooler hose pictures!
| Damages: | |
| 3 Assorted 2" ID radiator hoses | $35 |
| 2 90 degree mandrel electical conduit bends | $12 |
| 18 2.25" - 3" worm clamps | $18 |
| Total | $65 |